How to Make a Thick Butcher Block Table DIY
Original article: https://flowyline.com/blogs/for-diy-ers/how-to-make-a-thick-butcher-block-table
A butcher block table is a great addition to any kitchen, living room, or workshop. It is a sturdy and durable surface that can be used for decorating or even doing activities in the kitchen such as cutting and chopping. In addition, a butcher block table is also a beautiful and natural piece of furniture that can enhance the style and warmth of your space.
Butcher block tables are usually made of hardwoods, such as maple, walnut, cherry, and oak. They are constructed by gluing together strips or blocks of wood in a pattern that exposes the end grain of the wood. This creates a thick and solid surface that can withstand heavy use and long-term usage. In this article, we will give you instructions on how to make a thick butcher block table. Let's get started.

Needed Materials to Make a Butcher Block Table
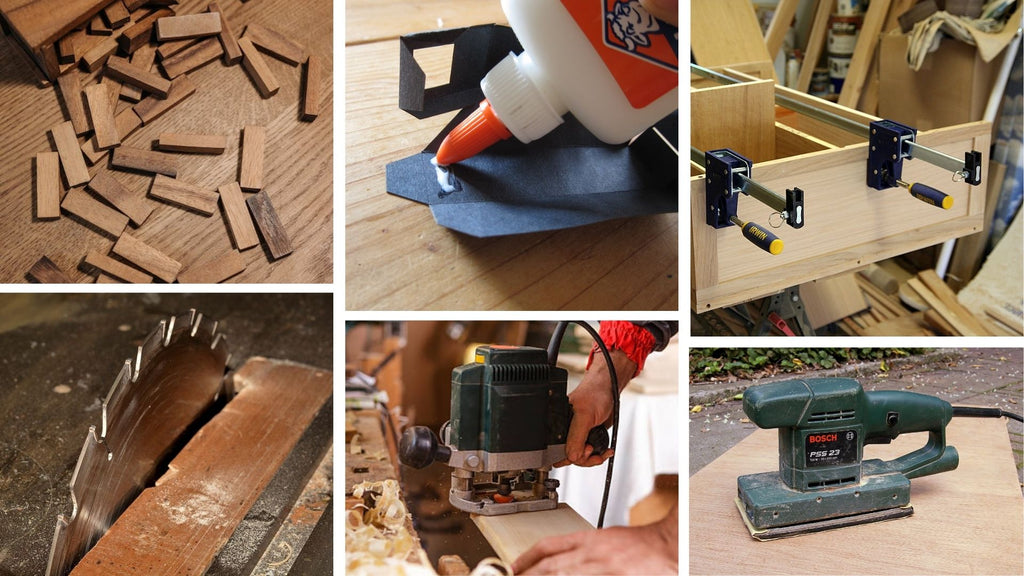
1. Wood strips or blocks of your choice
Both shapes of wood have their beauty and finished look. This depends on your taste. The size and quantity of the wood will depend on the desired dimensions of your table. The more wood pieces you get the bigger your table will be. For example, if you want to make a 40" x 70" x 2 3/4" table, you will need about 65 pieces of 1 1/2" x 2 3/4" x 40" wood. You can use any hardwood you like. Mixing and matching different types of wood is a great idea for a more interesting look.
2. Wood glue
You will need a lot of wood glue to join the wood pieces together. Make sure you use high-quality and waterproof wood glue that can bond well and resist moisture and heat. You can use Titebond wood glue for this project.
3. Clamps
You will need 3 to 6 clamps to hold the wood pieces together while the glue dries. You can use pipe clamps, bar clamps, or C-clamps, depending on the size and shape of your table.
4. Saw
You will need a saw to cut the wood pieces to the desired length and width. You can use a table saw, a circular saw, a milter saw, or a hand saw, depending on your preference and skill level.
5. Planer
You will need a planer to smooth and level the surface of your table. You can use a power planer, a hand planer, or a jointer.
6. Sander
You will need a sander to sand and polish the surface of your table. You can use a belt sander, an orbital sander, or a hand sander. You will also need different grits of sandpaper, from coarse to fine (80-400 grits), to achieve a smooth and even finish.
7. Finish (oil, wax, varnish or polyurethane)
You will need a finish coat to protect and beautify your table.
Required items to assemble a thick butcher block tabletop
The following sections are the steps to make a thick butcher block tabletop
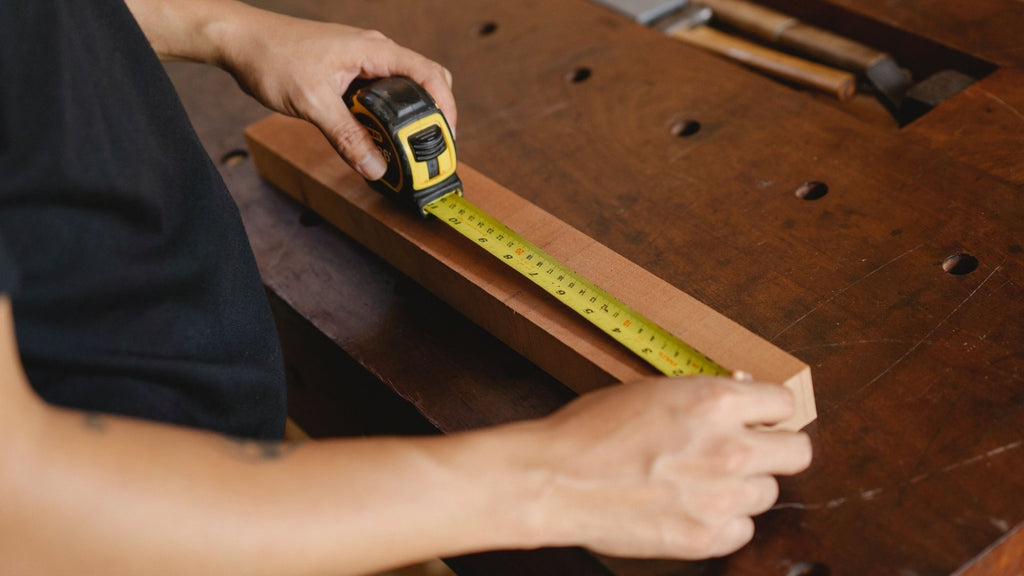
1. Cut the wood piece
Using a saw, cut the wood pieces to the needed length and width. Make sure the cuts are straight and accurate. This will affect the quality and appearance of the entire project. You can use a tape measure, a ruler, a jig, or a brush pen to mark the lines before cutting. You can also use a crosscut sled or a milter gauge to make the cuts easier and more precise.
2. Arrange the wood pieces
Arrange the wood pieces on a flat surface to see how well the wood blocks or strips blend. This will help you to measure the wood pieces more accurately and adjust the details before starting to glue them all together.
3. Glue the wood pieces
Use wood glue to stick the pieces together in a pattern that exposes the most beautiful grain of the wood. You can arrange them in the pattern that you like such as a checkerboard, a herringbone, or a random arrangement.
Make sure the glue is spread evenly on the mating surfaces of the wood pieces. You can you a brush, a roller, or even your fingers to apply the glue. You can also utilize a biscuit joiner, a dowel jig, or a spline jig to reinforce the joints and align the wood pieces better.

4. Clamp the wood pieces
Using clamps, fasten the wood pieces together tightly and securely. Make sure the clamps are evenly distributed and apply enough pressure to squeeze out the excess glue and close any gaps. You can use cauls, blocks, or shims to prevent the clamps from denting or marring the wood.
After finishing those steps, you can use a level, a straightedge, or a winding stick to check the flatness and squareness of the tabletop.
Let the glue dry completely. This may take several hours or overnight, depending on the type and the amount of glue you use.

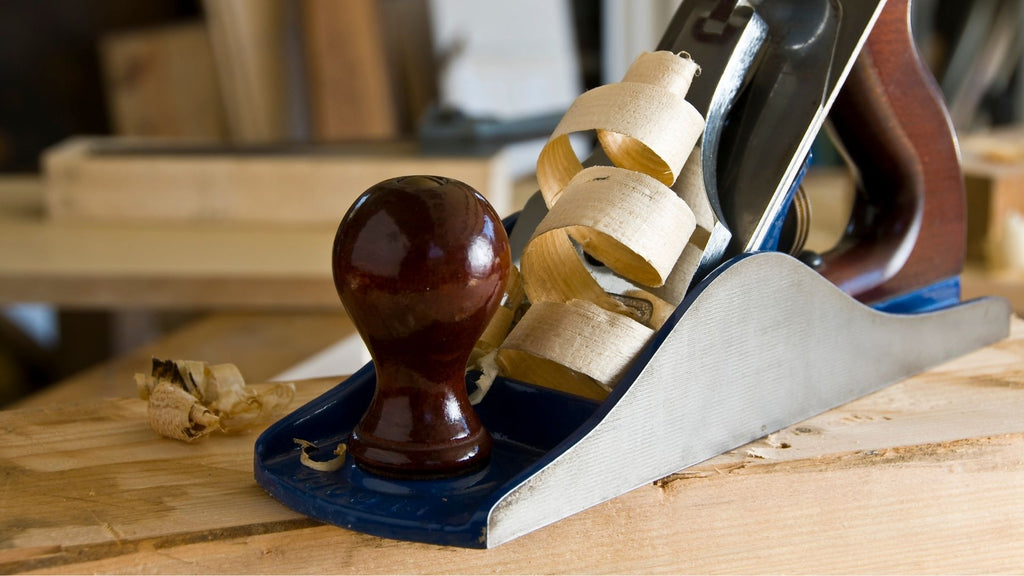
5. Plane the wood surface
Use a planer to smooth down and level the tabletop's surface. Make sure the planer is sharp and adjusted properly, and feed the wood slowly and steadily. You can use a sled or a jig to support the wood. This will help us to prevent snipes and tearouts.
If there is any residue and irregularities, use a scraper, a chisel, or a knife to remove them. You may need to plane both sides of the wood surface for a perfect look. This will depend on the thickness and flatness of your tabletop.
6. Sand the wood surface
Sand the wood surface to polish and refine it. You can start with a coarse grit of sandpaper (80 - 100 grits), and work your way up to a fine grit (220 - 320 grits). Make sure you sand in the direction of the grain.
Removing any dust or debris between each grit is important. You can use a tack cloth, a vacuum, or compressed air to clean the wood surface.
For a better look, you can also use a hand-sanding block or a sanding sponge to sand the edges and corners of your butcher block table top.

7. Finish the wood surface
Apply the finish coat in a well-ventilated and dust-free area. You can use a brush, a rag, a roller, or a spray to apply the finish. You may need to apply several coats of finish, depending on the type and amount of finish that you use. We may also need to sand lightly between each coat of finish (use 400 - 600 grits) for this step.
It may take several hours or days for the finish coat to dry. Make sure your finish coat cures completely before starting to use it.

After finishing the entire project, you can decorate your table by adding table runners, placemats, napkins, or tablecloths, depending on your style and mood. We hope you found this blog on how to make a thick butcher block table helpful and informative. If you have any questions or comments, please share them with us on social media platforms such as Facebook, YouTube, TikTok, Instagram, et cetera. Thank you for reading and happy woodworking!
To read the entire article and discover over a hundred tips to improve your living area, click this link: https://flowyline.com/blogs/for-diy-ers/how-to-make-a-thick-butcher-block-table

Comments
Post a Comment